Drawing a bird can be an enjoyable and rewarding experience. Whether you’re a beginner or an experienced artist, following A simple step-by-step guide can make the process easy and fun.
In this guide, we will walk you through how to draw a bird step by step, using basic shapes and techniques. This will help you create a beautiful bird drawing that is both accurate and visually appealing.
Draw a Circle for the Head and an Oval for the Body
Start your bird drawing by creating a circle for the head. This is the first and most basic shape, and it will serve as the foundation for the bird’s head. The circle should be placed towards the top of your page,
leaving enough space below for the body. Next, draw an oval shape for the body. This oval should be positioned beneath the circle, with the smaller end of the oval pointing towards the bottom.
The head should be positioned towards the top of the page, while the oval body can take up most of the remaining space. This initial structure will guide you throughout the rest of your drawing, so take your time to get the proportions right.
Draw Lines for the Tail, Legs, and Beak
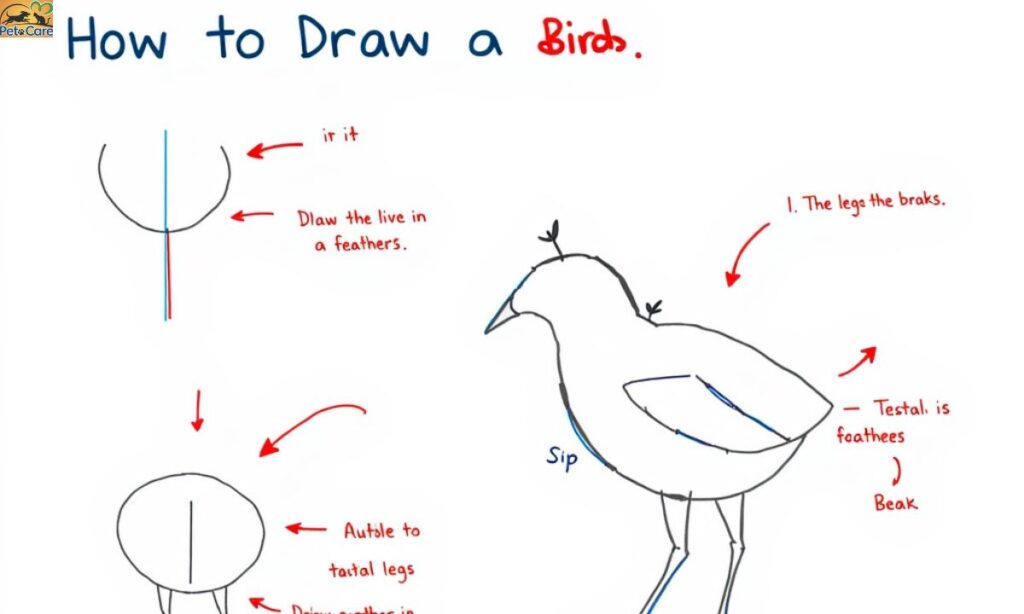
Now that you have the head and body in place, it’s time to add the bird’s tail, legs, and beak. Start by drawing a long, angled line coming out from the bottom of the oval. This will represent the tail feathers. The tail should be proportionate to the body—don’t make it too long or too short.
Next, draw two lines extending from the lower part of the oval for the legs. Position the lines in a way that makes them look natural, as birds usually stand with their legs slightly apart. Add small feet at the bottom by drawing simple talons or claws.
For the beak, draw two short lines coming out from the front of the circle. The beak should be relatively small, so keep it proportional to size of the head. The angle of the beak can vary depending on the type of bird you are drawing, so you have some flexibility here.
Read This Blog; Which Shotgun Choke is Best for Hunting a large, Slow Bird, Such as a Turkey?
Draw a Shape for the Wings, Lines for the Talons, and a Shape for the Eye
At this stage, it’s time to start forming the wings and eyes. The wings are a significant feature of the bird, and they can vary depending on the bird species you are drawing. Start by drawing a simple oval or elongated shape on either side of the body to represent the wings.
Next, add the talons by drawing simple lines or small shapes at the end of the legs to represent the bird’s claws. This adds detail and realism to your bird drawing.
For the eye, draw a small circle on the head, placed towards the front of the circle. The size of the eye can be adjusted depending on the type of bird. Some birds have large eyes, while others have smaller, more subtle eyes.
Develop the Form and Add a Few Details
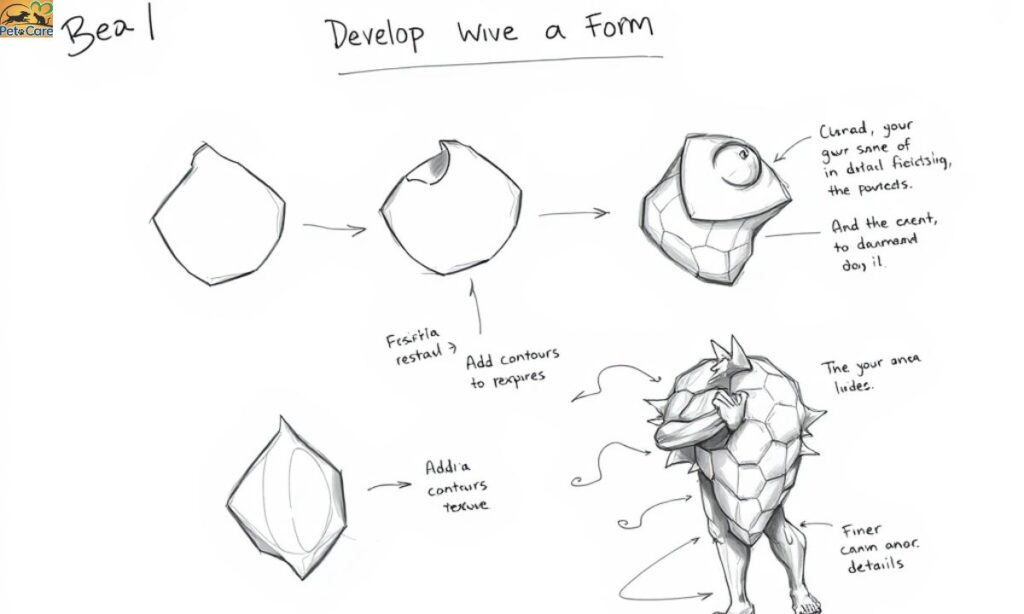
Now that you have the basic shapes and outlines in place, it’s time to start developing the form of the bird. Begin refining the head by giving it a more distinct shape. For example, draw a curve from beak.
For the body, refine the oval shape and add feathers. Birds’ bodies are typically covered in feathers, so you can draw short, curved lines along the edges of the body to represent this texture.
Don’t forget to add more details to the feet and legs. You can add small lines to indicate the texture of the bird’s feet and claws. Similarly, add more definition to the eye, giving it a small pupil and shading the outer edges to create depth.
Finish the Drawing with Heavy Lines and Value
To complete your bird drawing, it’s time to finalize the details and add depth. Go over your drawing with heavier lines to make the bird’s outline more prominent. This will make the bird stand out from the background and give it more definition.
Add shading to the bird to create the illusion of depth. Focus on areas that would naturally be in shadow, like the underside of the wings, body, and tail. This will make your bird look more three-dimensional and lifelike.
You can use gentle cross-hatching or soft shading to achieve this effect. Finally, erase any unnecessary lines from your sketch, leaving only the clean outline and details of the bird.
Frequently Asked Questions
Do I need to use a pencil for drawing a bird?
Yes, it’s a good idea to use a pencil first for sketching the bird’s basic shapes. Once you’re satisfied with the outline,
How do I draw bird feathers?
To draw feathers, use short, curved lines that follow the shape of the bird’s body or wings. Focus on grouping them in sections to create the texture of feathers.
Can I draw any type of bird using this method?
Yes, this method can be adapted for any bird species. Just adjust the details, such as the size of the wings, shape of the beak, or the size of the eyes, to match the bird you want to draw.
What are some tips for making my bird look realistic?
To make your bird look more realistic, focus on the proportions, symmetry, and texture. Add shading and small details like feather patterns
How can I improve my bird drawing skills?
Practice regularly and experiment with different types of birds. Study reference images of birds in nature to understand their anatomy and proportions better.
Conclusion
Drawing a bird step by step may seem like a challenging task at first, but with a little practice, you can master it. By starting with basic shapes and gradually adding details, you can create a beautiful bird illustration that looks both natural and expressive.
Remember to focus on the proportions, symmetry, and textures of the bird’s body and wings.In conclusion, drawing a bird is a great way to develop your drawing skills. With patience and attention to detail